

The kitchen troubles seemed insurmountable. I spent many hours in the kitchen, sitting and staring at all the problems, mentally rehearsing solutions.
While John did carpentry, I patched the walls. Most of the walls were sound with a few soft spots. I used another 200 plaster washers to shore things up.
The wall for the sink was a nightmare. It was partially masonry (the former chimney) and partially plaster. The masonry had shifted, so it was not all on one plane. The sink was wall hung, on a cast iron cleat – but that surface had to be strong enough to support a cast iron sink full of dishes and water. There were some headaches routing the pipes and drain for the sink, but solutions were found. Boards were screwed to the studs, which would be concealed under drywall. Both the 1/4″ and 3/8″ drywall was used on the wall, and some tricky transitions had to be built up to make the wall look like a continuous plane.

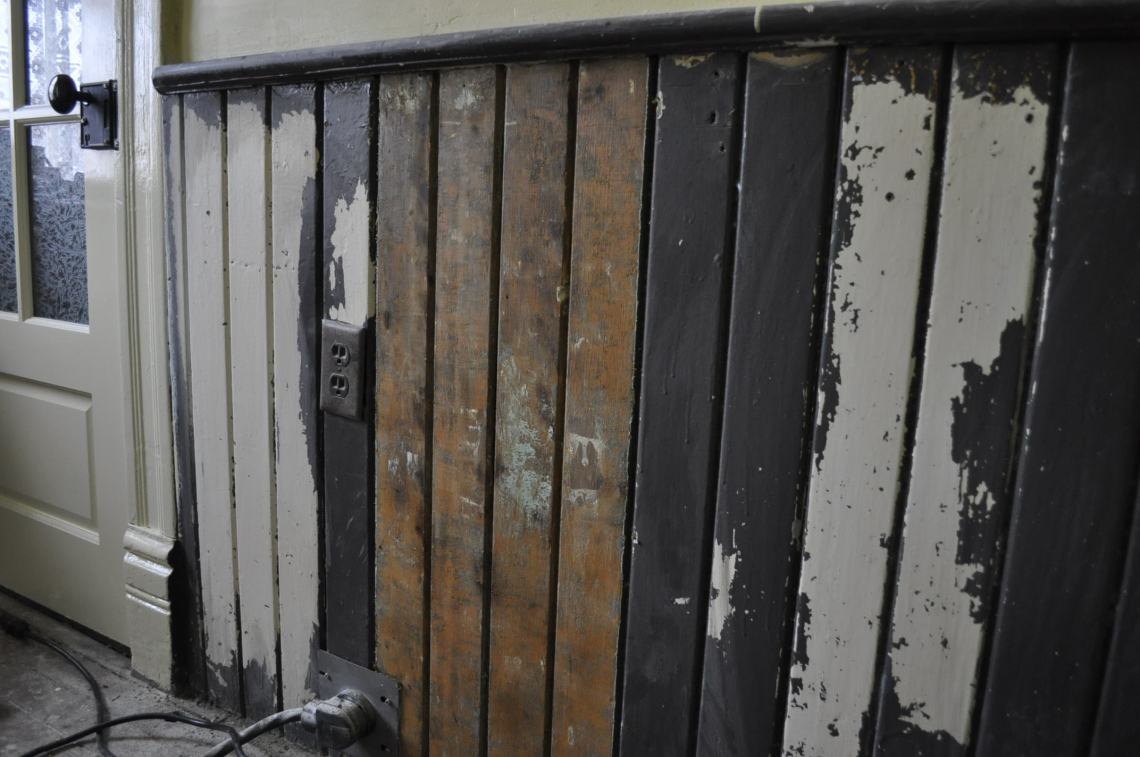
The original wainscotting behind the stove had paint that had blistered off the wood, from years of heat exposure. I heat stripped many boards. One thing that was really surprising that even though this wainscotting was originally painted, for use in a very modest house – that all the boards were clear – no knots at all.
The wall with the sink was the first to be finished and painted. It was more sensible to paint the wall then hang the sink, vs painting around it.
The sink and drainboard were free on Toronto Craigslist, from when I lived there. The person who was giving it away had an older house she was renovating. The sink was still mounted, so I had to find a competent person to undo the plumbing and remove it. I was very careful to take all the parts, including the giant mounting screws, and I also took photos of the underside before it was removed.
I had a moment of extreme panic months previously, when plumber # 1 pointed out that I needed to find a new gasket for it, as the one that came with it was cracked. There is a place in the US that sells antique plumbing components. They said their old supplier had dried up, and they did not have ANY of this gasket in stock, and did not know when they might get some more. Horror ! I started emailing any vintage oriented plumbing places I could find and nobody had this part. On Ebay there was ONE of these gaskets listed, from a seller in Quebec. Due to the seller’s Ebay settings, there were a bunch of hassles completing the transaction because I was in Canada. Hoops were jumped through, and one day this part arrived in the mail. And it FIT.
If you are looking for an antique wall mounted drainboard, this is what the bracket looks like, and how it is mounted:
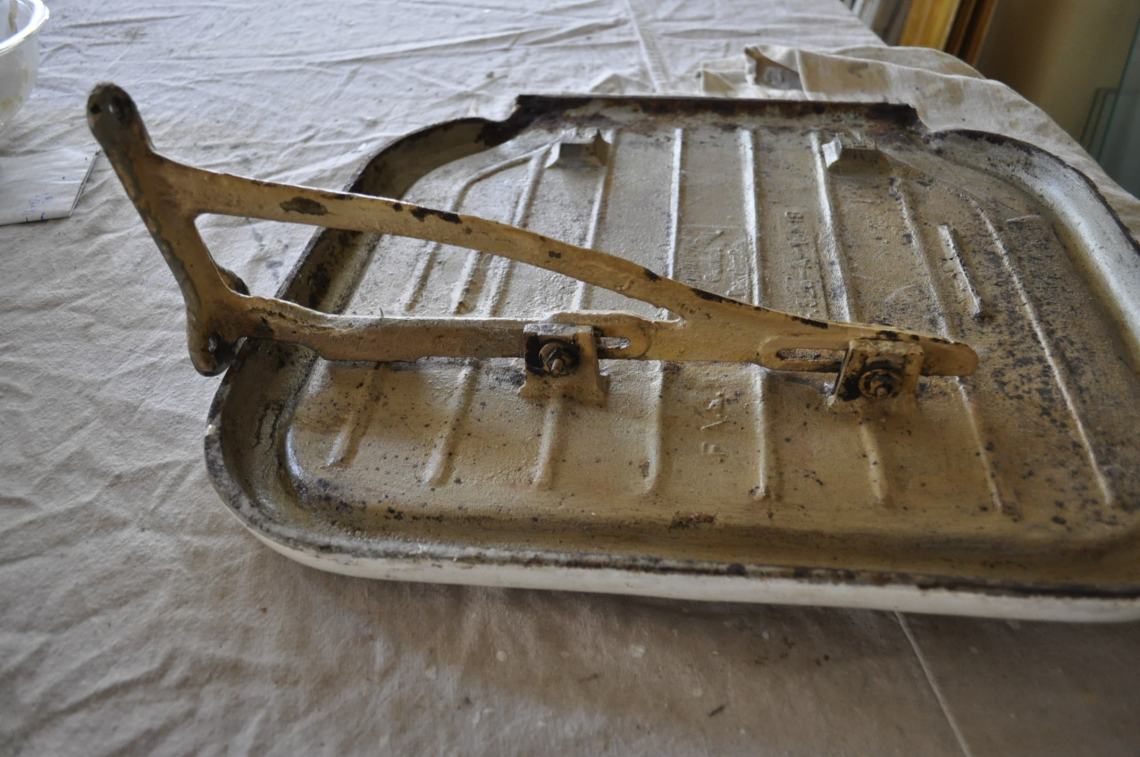
That looked pretty grotty, so I sprayed it matte green, the same as the underside of the sink. The elusive cast iron sink gasket was also sprayed. That is what it looks like if you need one. Good luck with finding one if you need it, I really mean that !

Salmon Plumbing was willing to install my antique sink. The height of the sink that came with the house always bothered me, as I felt stooped over washing dishes. It was 28″ to the bottom of that sink. I had my new old sink installed 4″ higher, so it was 32″ to the bottom of the sink. At first the height looked a little strange – but using it to do dishes was such a relief. It was a functional height ! I am about 5’7″ tall – but it made me wonder about the standards that had evolved around kitchen fixture heights. A fancy chrome drain could have been used – but there were more complicated headaches in attaching that to the ABS. At this point I really didn’t care about the decorative value of a drainpipe, so ABS it was.

What is invisible in this photo is the location of the former heat vent. It was patched over with salvaged tongue and groove wainscotting, so it looks like nothing ever happened there. I primed over all the dark grey then painted it with Benjamin Moore Advance enamel in “Weston Flax” (HC-5):
The final wall color is BM “Hawthorne Yellow” (HC-4):

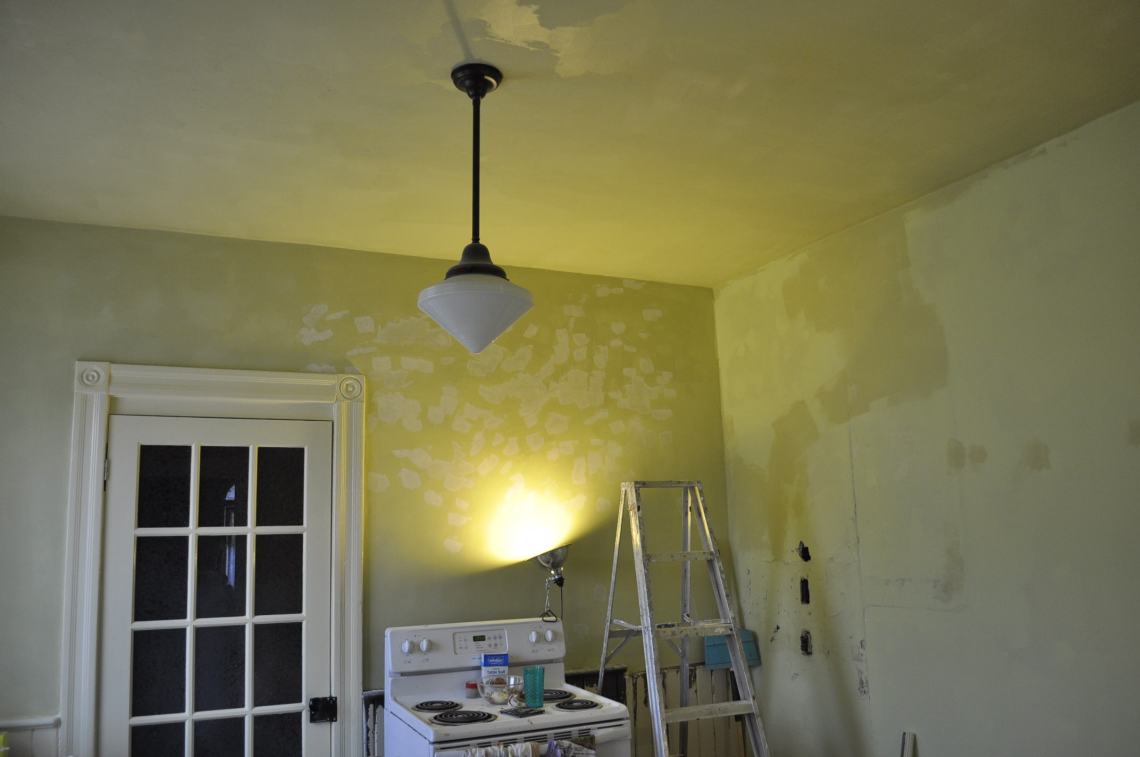
Meanwhile, I primed the rest of the room using a tinted oil based primer. Oil based primer is best on areas that have a lot of skim coating repairs. Joint compound can be reactivated (ie get soggy) with a water based latex, so oil primer it was. My preference is to get the primer tinted so I can better see any areas that need a final touch up.
The kitchen walls and ceiling were now smoothER. Even after all the skim coating and sanding, there were still minor dings to patch one last time:
The wall where the cabinets would go was prepped with the outlets. It was the least smooth, as the cabinets would take up almost the entire wall.
I had found an original color on the ceiling, which was a pale minty green. I saved chips from it, and had the color custom mixed at the paint store. I was absolutely confused when I applied the color and beside the Hawthorne Yellow walls, the ceiling looked blue. BLUE ! But the chip was correct and green, even while dry. I guess this must be due to the door and windows facing north, as there was no other explanation.
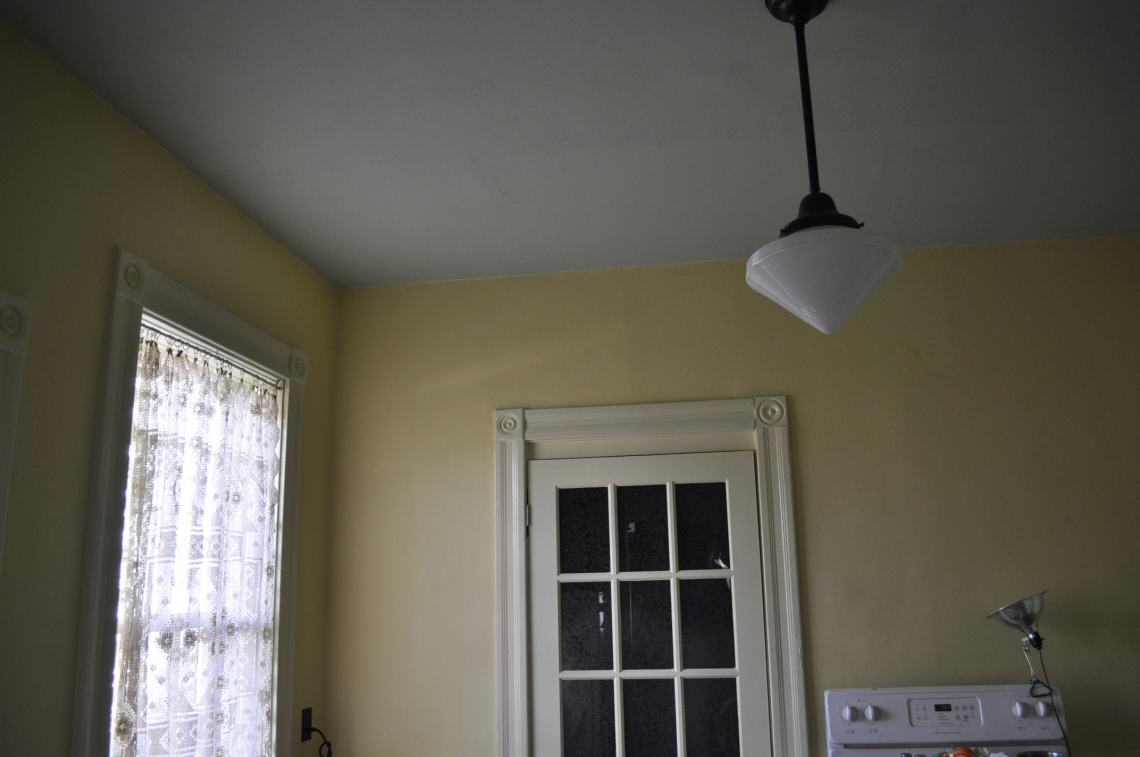
The wall with the powder room door, before:

The powder room wall, After. So much work to make it look like a normal wall:

