

One thing that was really good about the house was that there were already storm windows installed over the original wood sash windows. Someone had let those old windows with the wavy glass be and did not slam in some vinyl replacement windows.
That bad news was that the storm windows were aluminum storm windows. These are probably a decent product for a contemporary home built in the same time period the aluminum storms were made. I am guessing they were installed anywhere from the 1950’s – 70’s. The 1950’s house I grew up in had metal windows, the wide and high kind you see on 50’s style bungalow/ranch-ish houses.
On a pre-20th century house, original storm windows were wood, and are meant to be put on in the fall and taken off in the spring. This means climbing up and down a ladder with a somewhat heavy storm window, which wouldn’t be my idea of a good time. The storms would need to be stored somewhere when they weren’t in use. Periodically they would need to be repainted, and the glazing putty repaired or replaced.
I understand how the idea of a permanently applied storm window, with a built in screen, that never needed painting would sound like an attractive product.
Whoever installed the storm windows had to do some tinkering, as this style of window did not properly fit into the areas the wood ones do. This meant covering up the original wood sills, to raise them. This person then used a copious amount a caulk to basically glue them in place, then screwed them on.
The theory would have been to make the storm windows as airtight as possible. However – those antique wood storm windows did not fit that tightly. This was because it was important to leave enough space for ventilation, for condensation to escape. Some storm windows had several holes near the bottom while others had a slot, with a piece of wood that could be flipped down to cover or expose the slot from the inside of the house. With the aluminum storm windows sealed on, the only place for condensation to go was down. Decades of this condensation deeply rotted the sills .
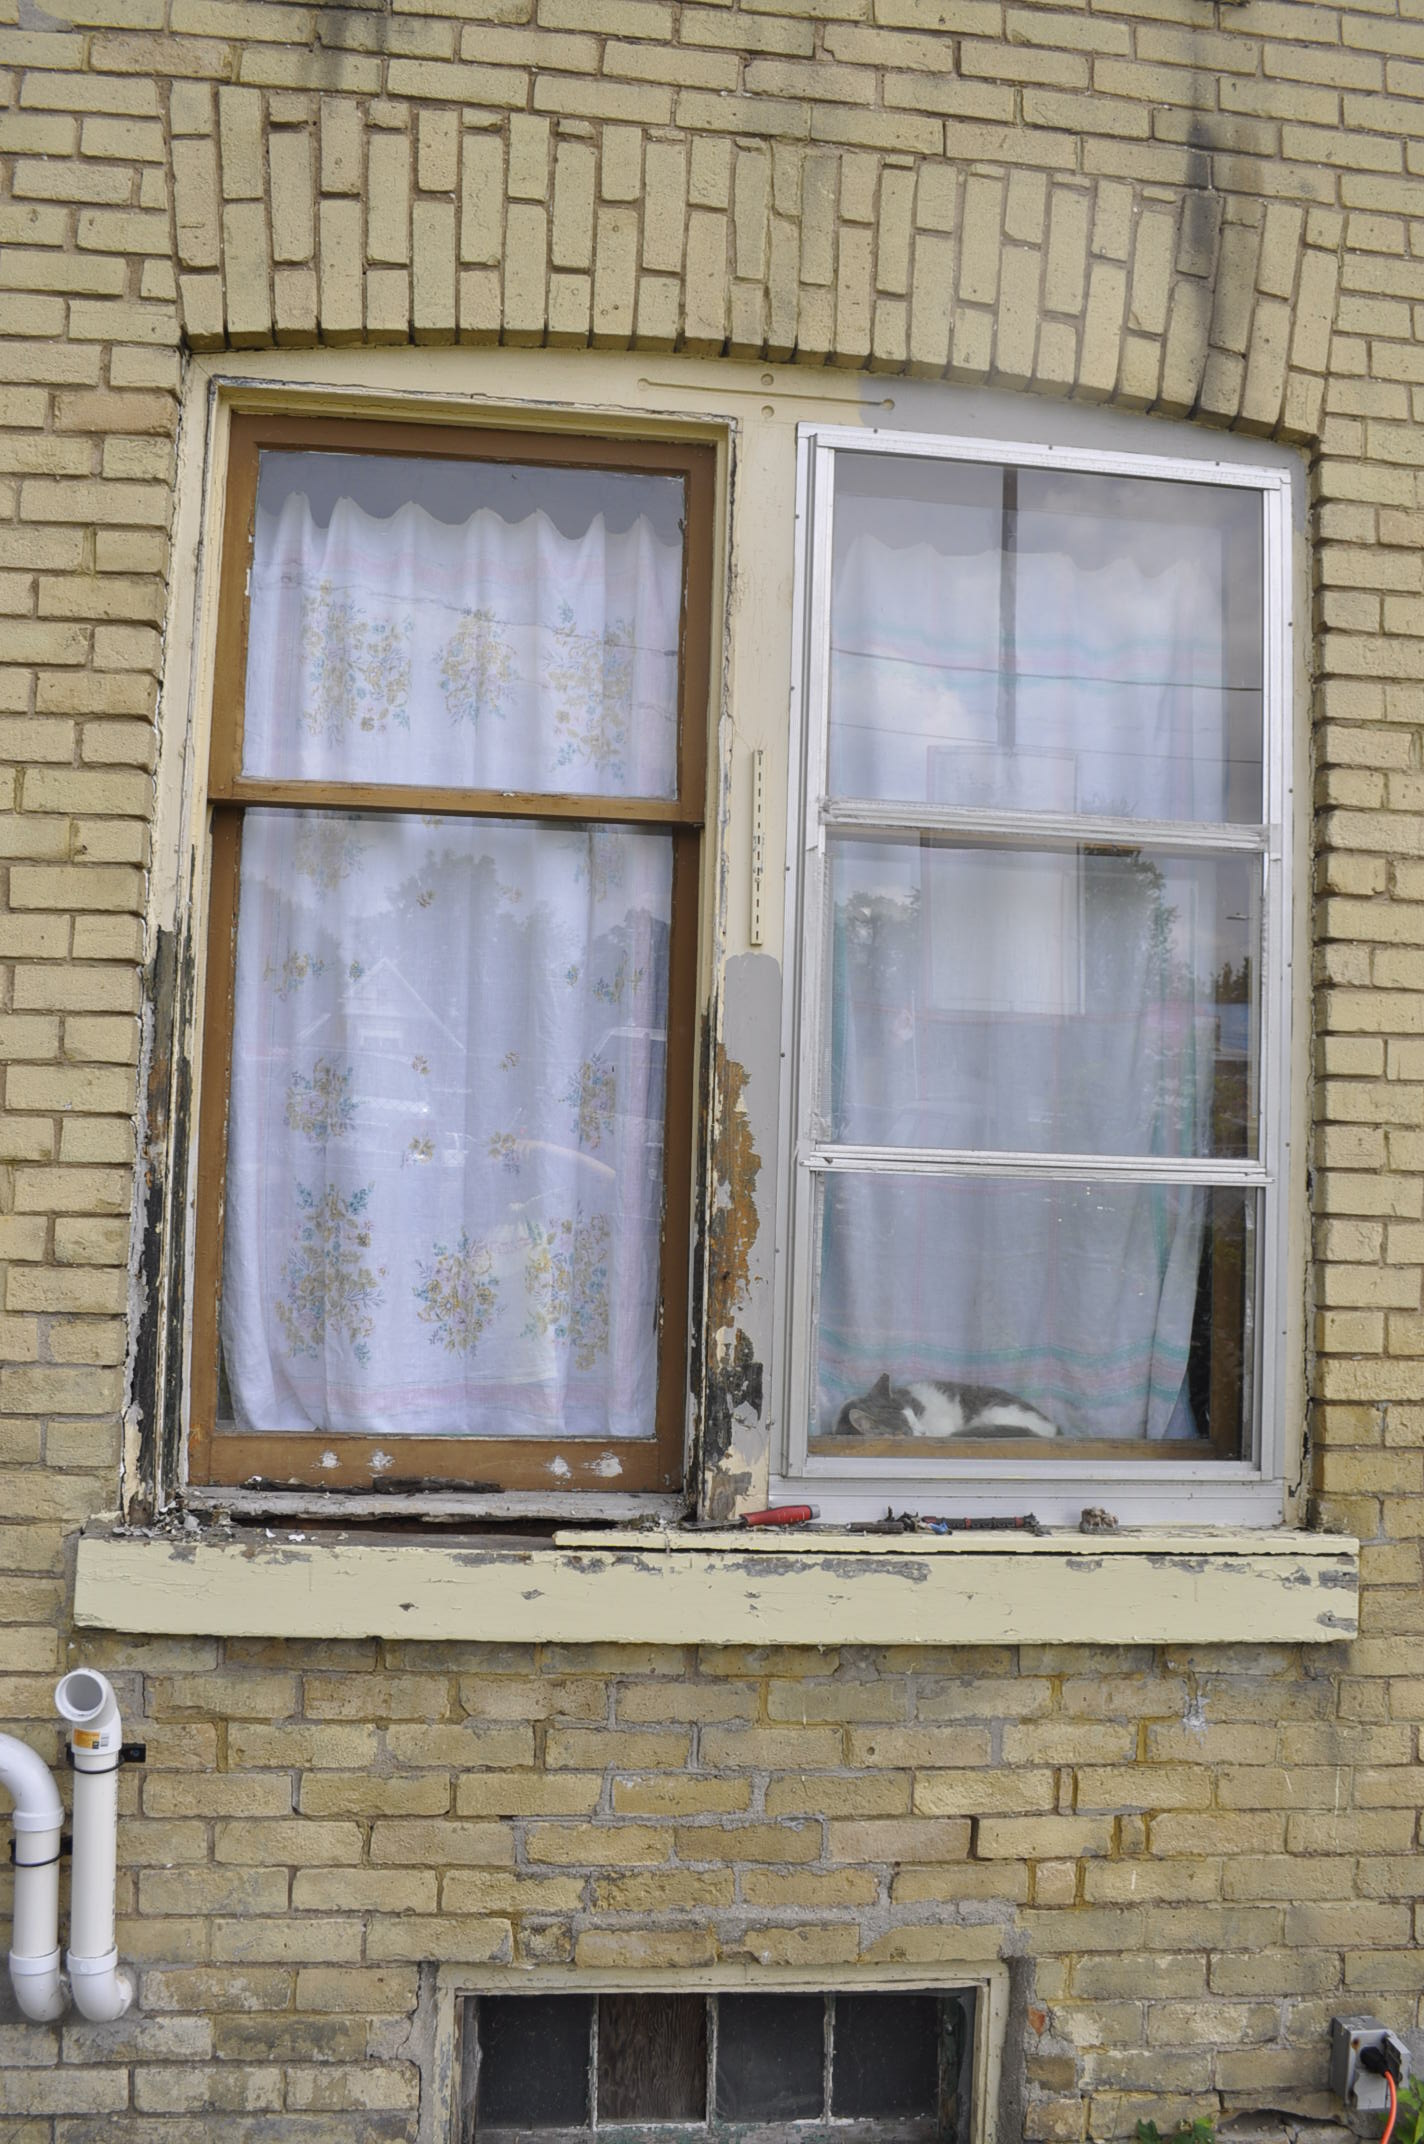
I knew something was definitely up with the window sills, from before I bought the house. It was possible to replace them, though the sills would need to be custom milled as big box stores do not carry them in wide and deep enough sizes for an old house. This is how the kitchen window sill looked, with the aluminum storm window still in place:
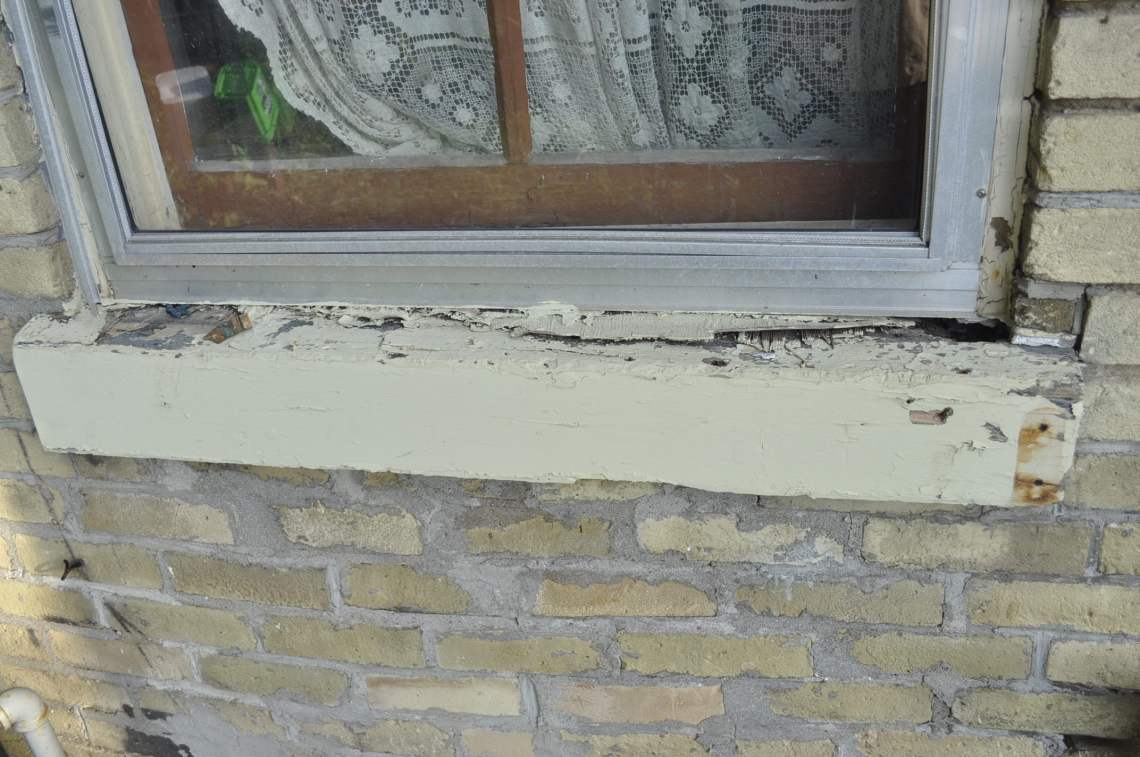
There is some obvious rot on the right corner. The window underneath looked like it was in decent shape, without any serious deterioration. The glazing putty needed some repairs.
Getting the storm windows off was terrifying. Even with all the screws removed, those storms were STUCK. I loosened all around the perimeter of the storm window with a razor blade then a putty knife, and it was barely budging. I used more force, which made the window frame torque, which shattered the glass. Non tempered glass. Giant shards hit the cement. This was pretty scary, while standing on the top of a 6′ ladder working alone. I ran inside to look in a mirror, in case I had a major gash that I wasn’t feeling. I was so lucky that I didn’t – only a couple of small cuts on one hand.
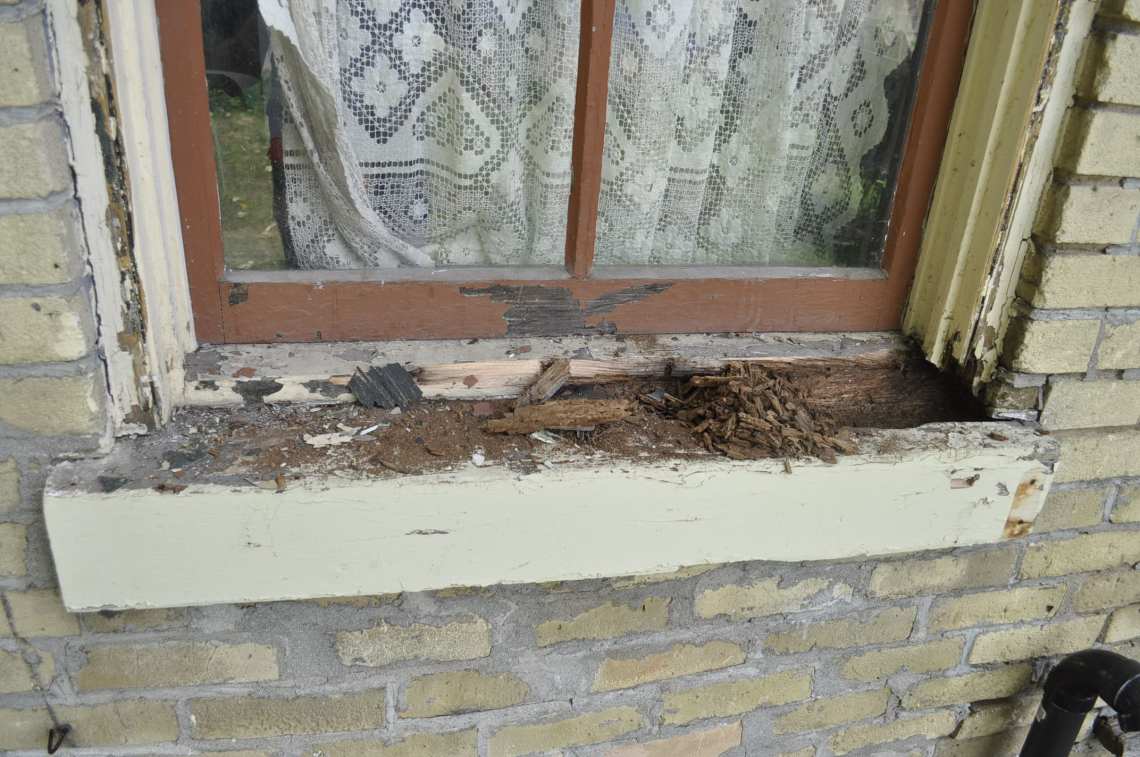
With the window off, I got a better look at the sill troubles.
The installer put a board or a piece of painted plywood over the sill. This did two things. It covered up the problem – probably a slightly rotted sill 60 years ago – and made the sill more level. Yet sills are properly made with a slight slope, so water runs away from the window to prevent rot. This situation was not going to be good.
This is the sill with the covering board pried off. The wood in that rotten corner felt and looked like damp garden mulch. There was an active colony of carpenter ants in there, too. A real ant city.
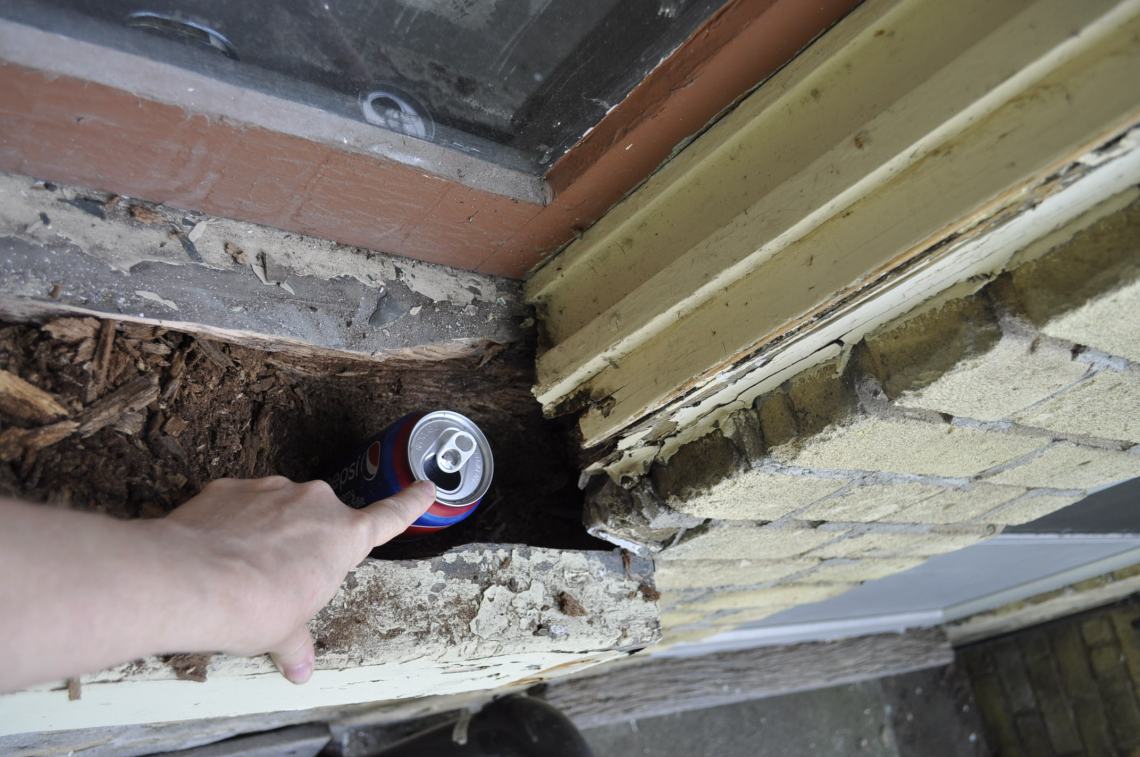
There’s a can of Pepsi to show how deep this rot was. It was BAD.
The kitchen window and the dining room windows were similarly affected. They both faced north, and were on the ground floor. The narrow bay window in the front looked like it was also compromised, though someone had nailed a tin cover over that.
Now before I went digging away at this, I had the good luck to have connected with a carpenter, John, who had the skills to replace these sills. He had actually been one of my former client’s high school shop teachers, who connected me to him.
If you need old fashioned custom millwork done, the only reliable place I know of is Hoffmeyer’s, in Sebringville, close to Stratford. They really know their stuff – but they are also typically very, very busy.
John had the good sense to go there directly to speak with them. I had previously emailed them some questions about getting trim milled, but their email reply took days, and they asked me to phone them instead. They were just getting ready to make some sills for someone else, so John was able to get my sill order squeezed in, too. He had the correct carpenter speak, too.
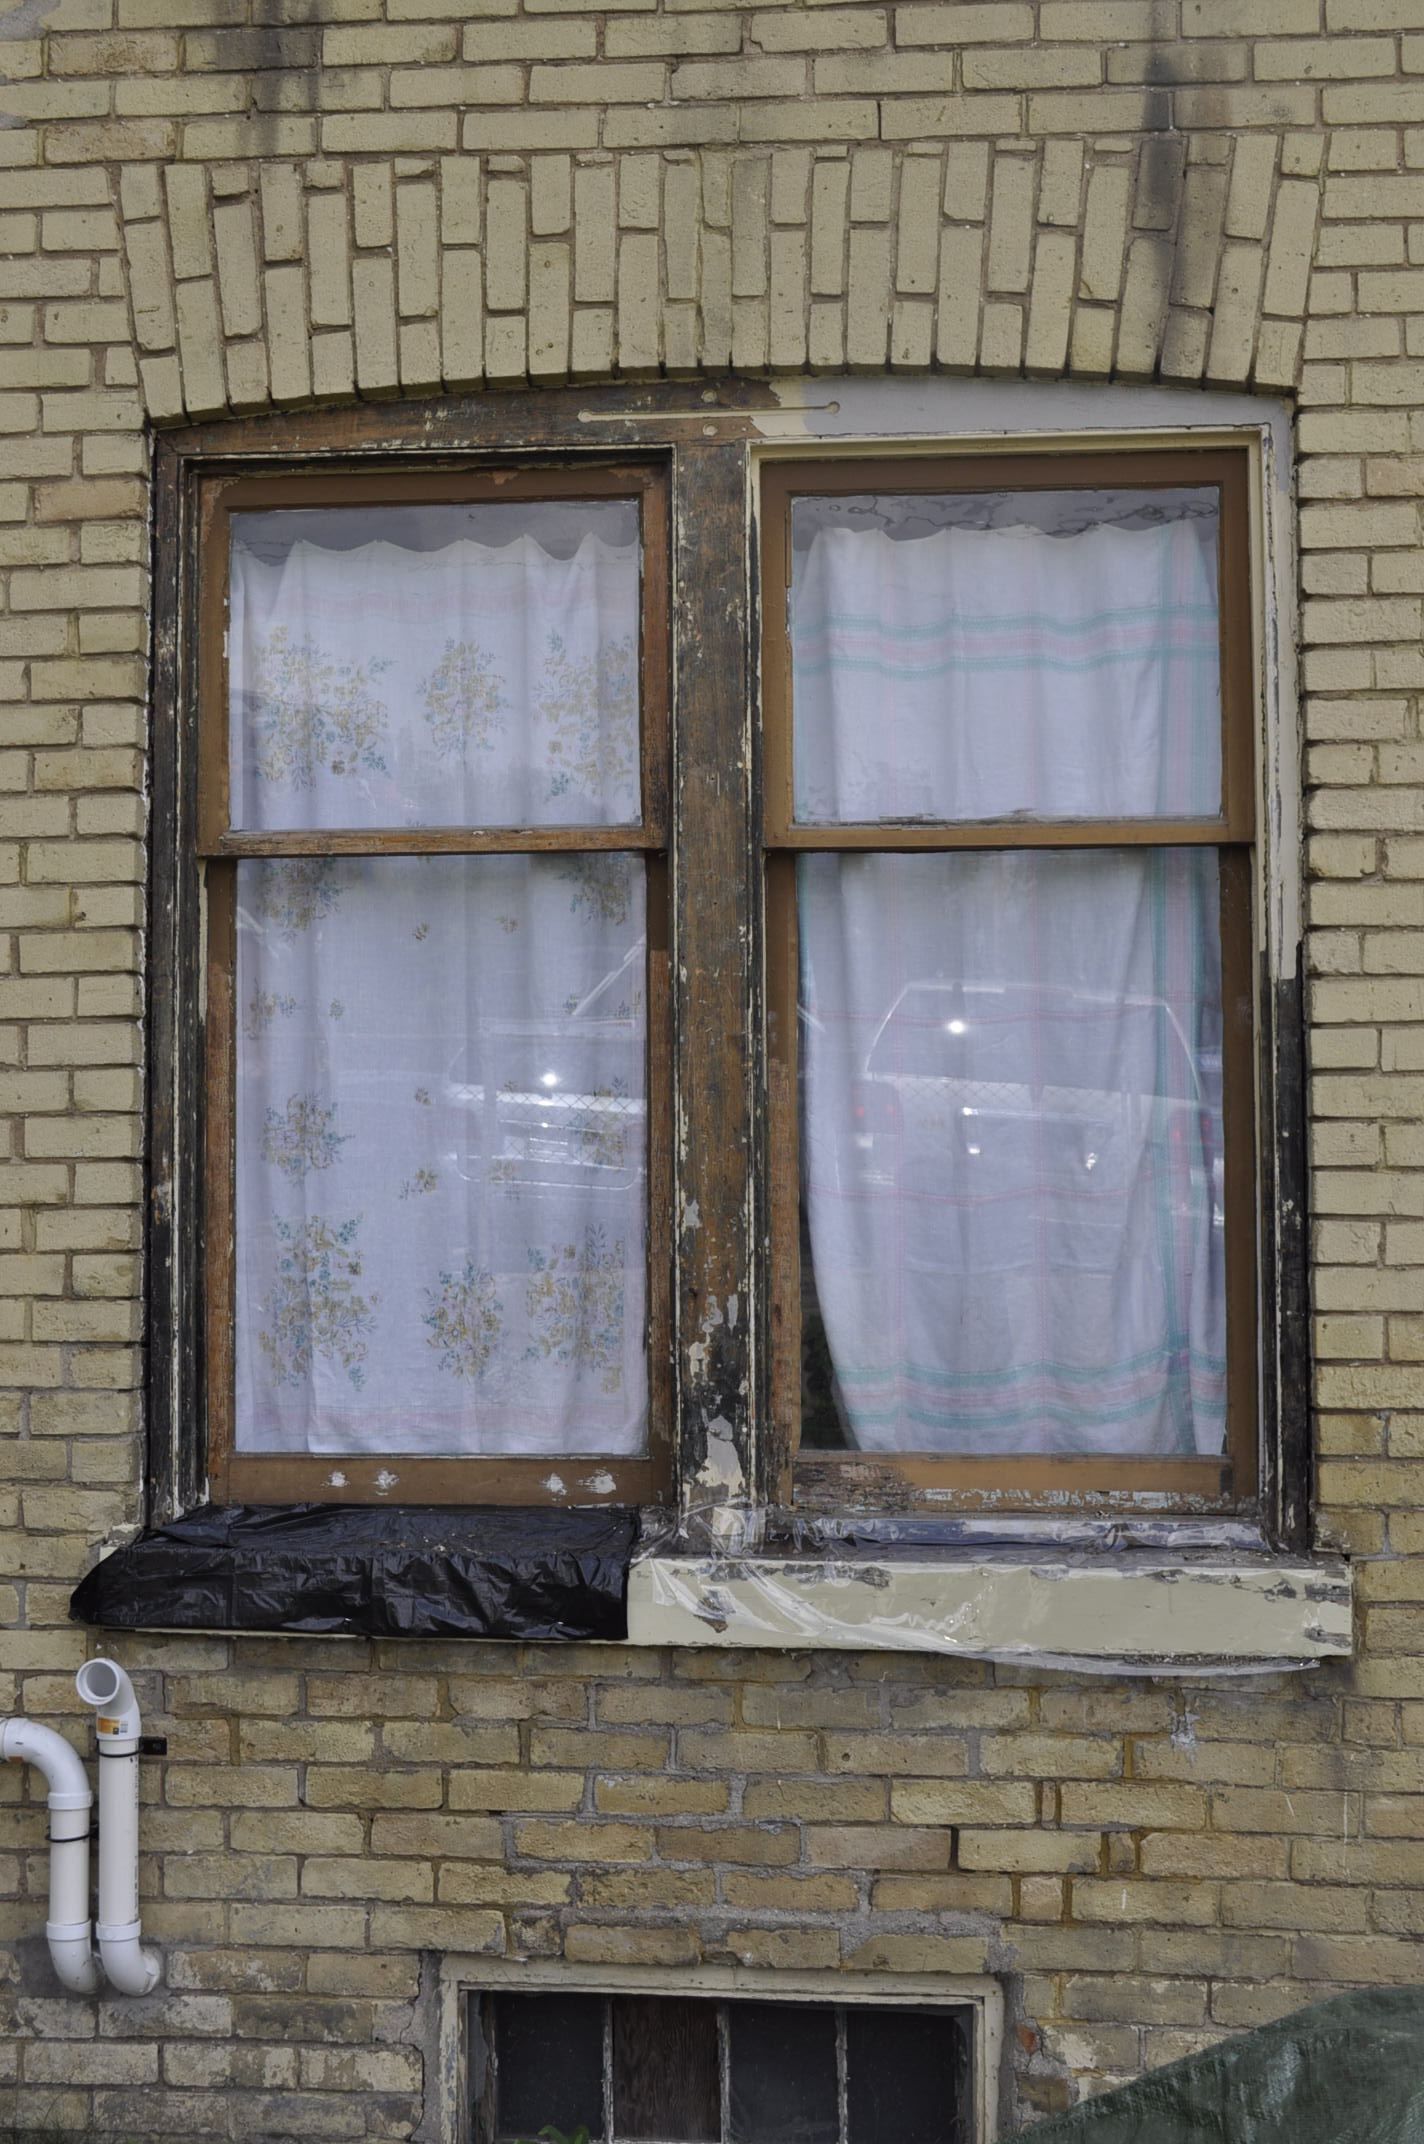
I stapled heavy plastic over the exposed rotten sills to let the surrounding structure dry out.
While I was waiting the month or so for this to happen, I took the storm windows off the dining room and front bay window and worked on replacing the missing or damaged glazing putty. I heat stripped the paint. There was some type of primitive caulk material between the brick and wood window frames. It was loose and cracked, so it was more sensible to dig it out and replace it. This stuff was black, and softened and bubbled with heat. I suspect it was probably pine tar, as it didn’t smell oily like road tar. When it was cool it was rock hard.
I inserted backer rod into this gap, then used paintable caulk. I primed and painted the windows. I had paint mixed that matched the brick, so that went over the caulked areas.
If you could overlook the sill apocalypse the windows were looking better at least.
The dining room windows, with one storm window off, one still on.
Heat stripping in progress. I was very leery of getting too close to the glass, as heat will quickly crack it.

Painted but still waiting on the sills.
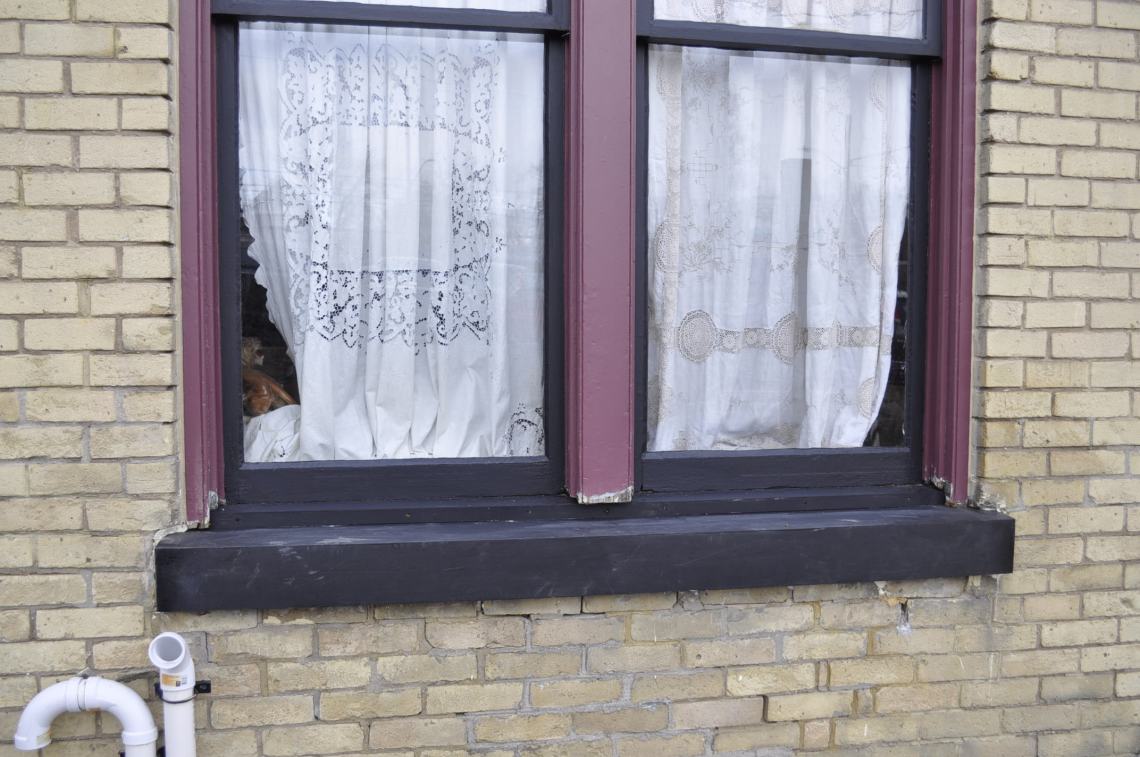
New sills at last. (Yes, the wood frames near the sill needs to be patched in). It was so exciting to have sills that were so unremarkable and solid looking. John did a great job of getting the rotten ones out and the new ones in. There wasn’t any rot within the wall, which was more good fortune. Its impossible to know what surprises may be lurking, until you get things opened up.
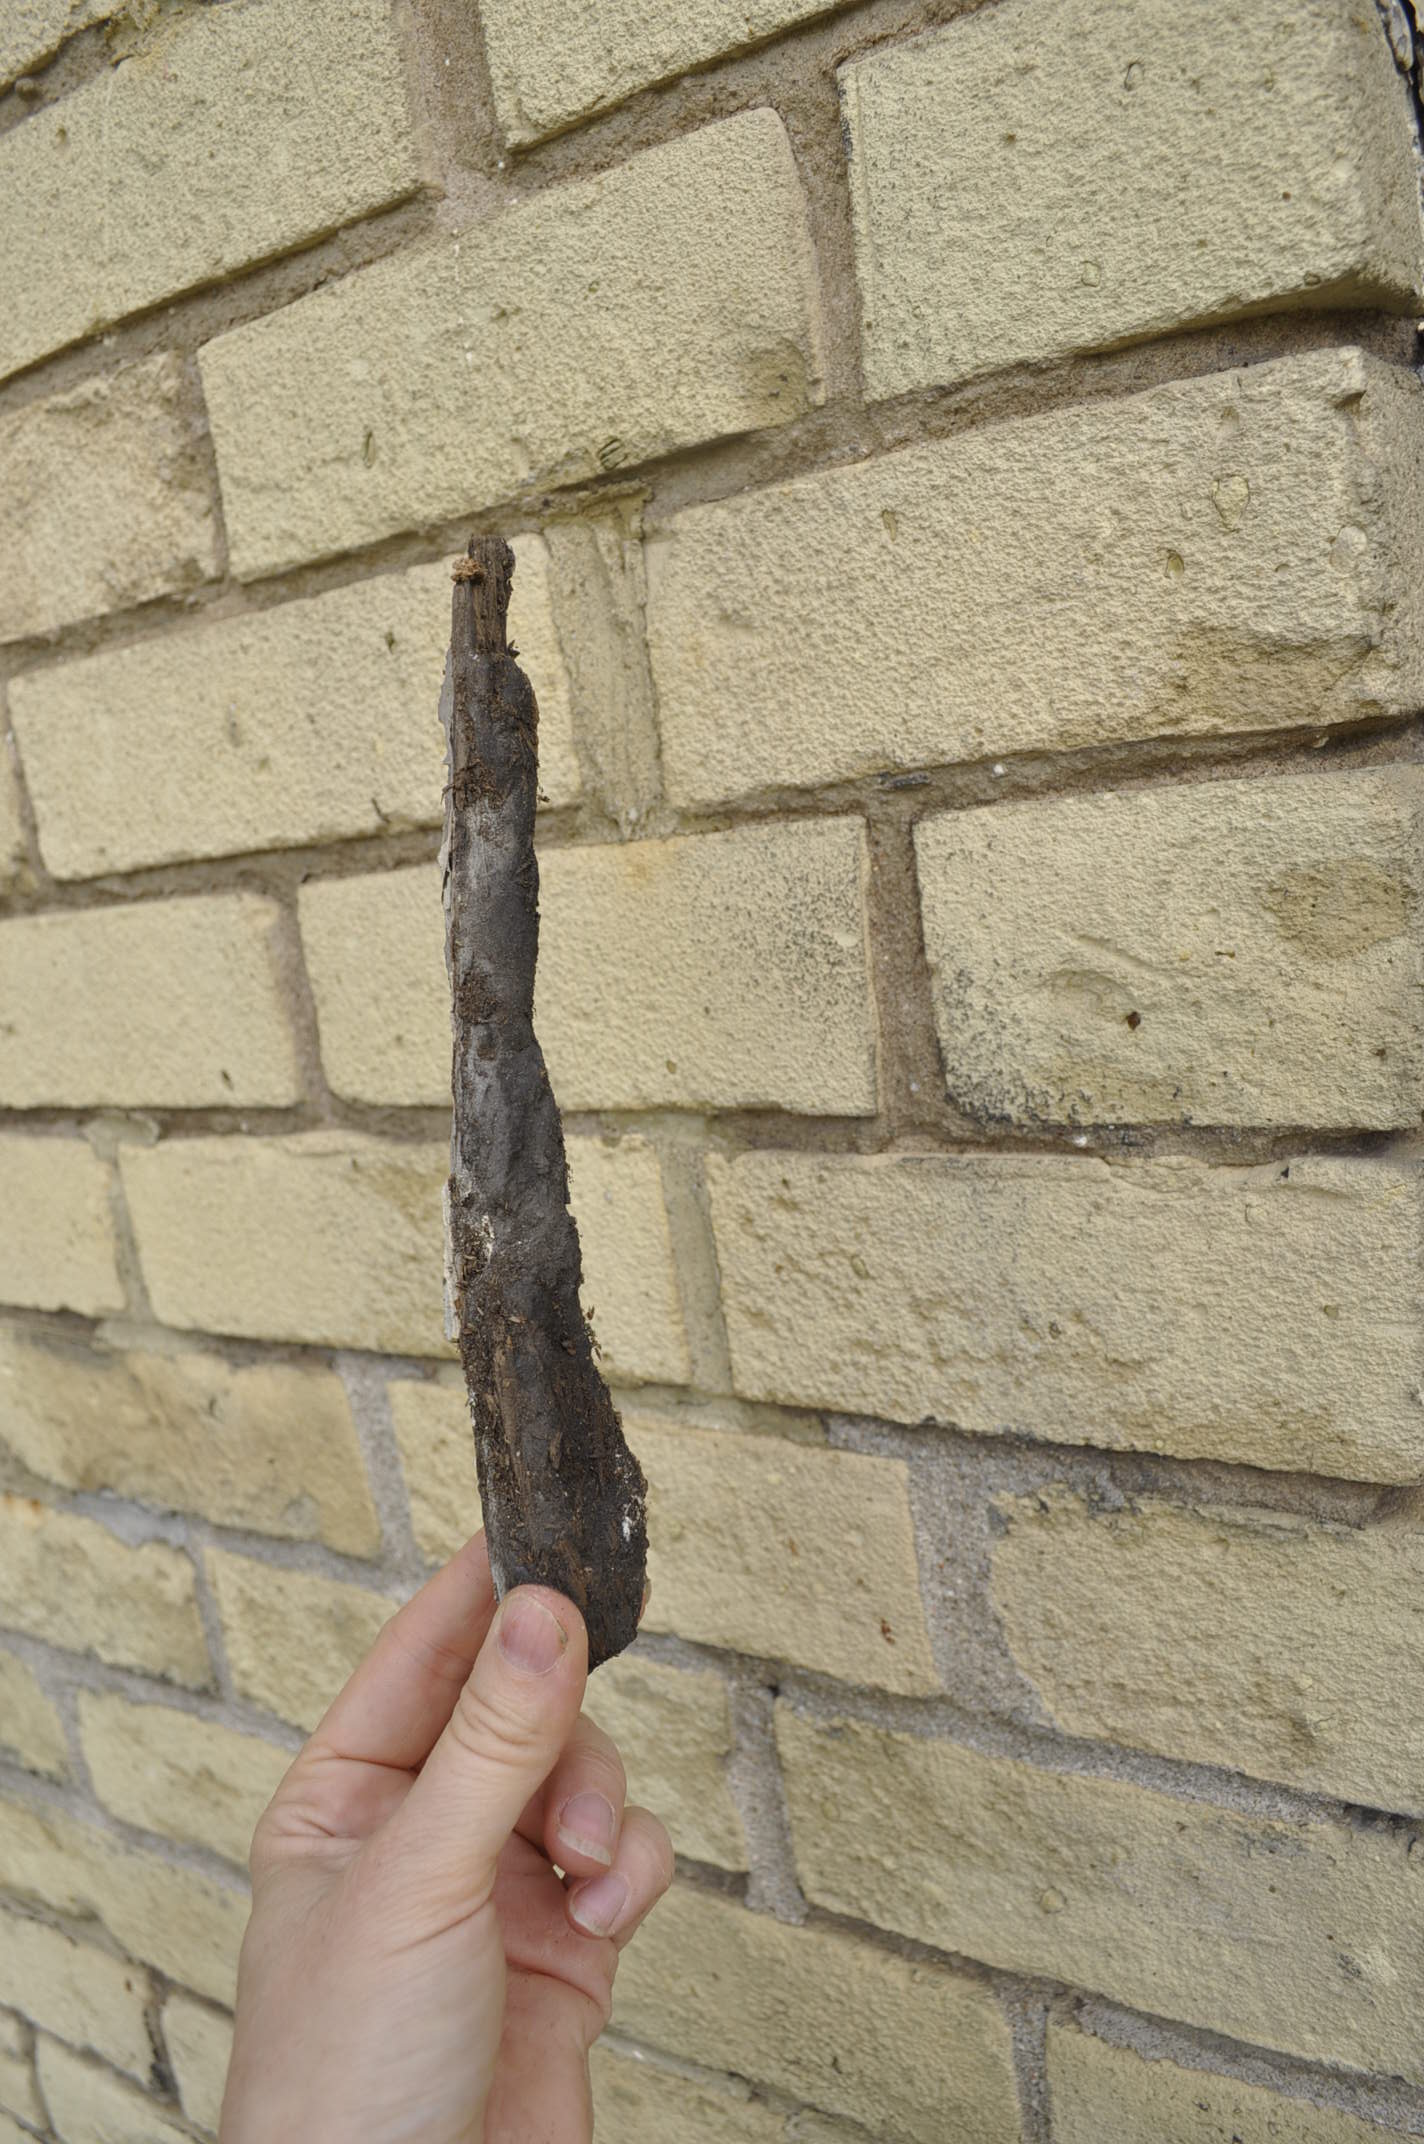
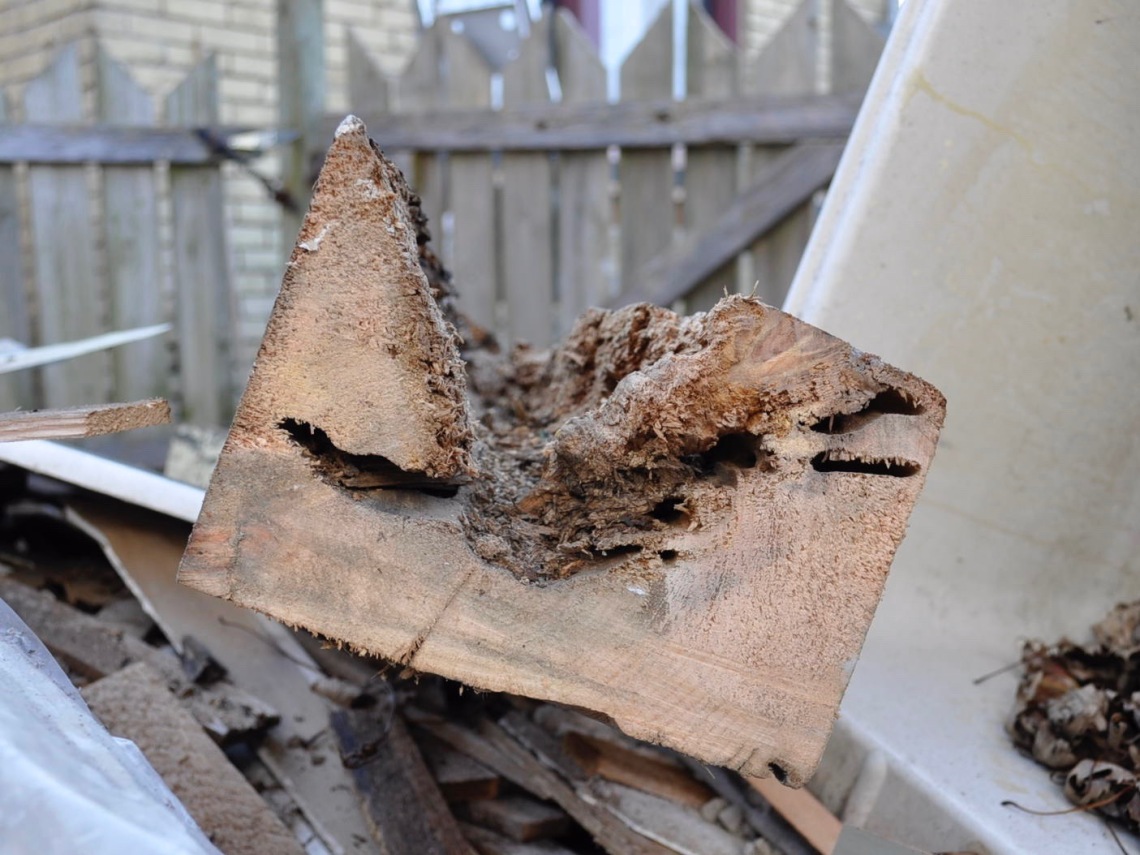
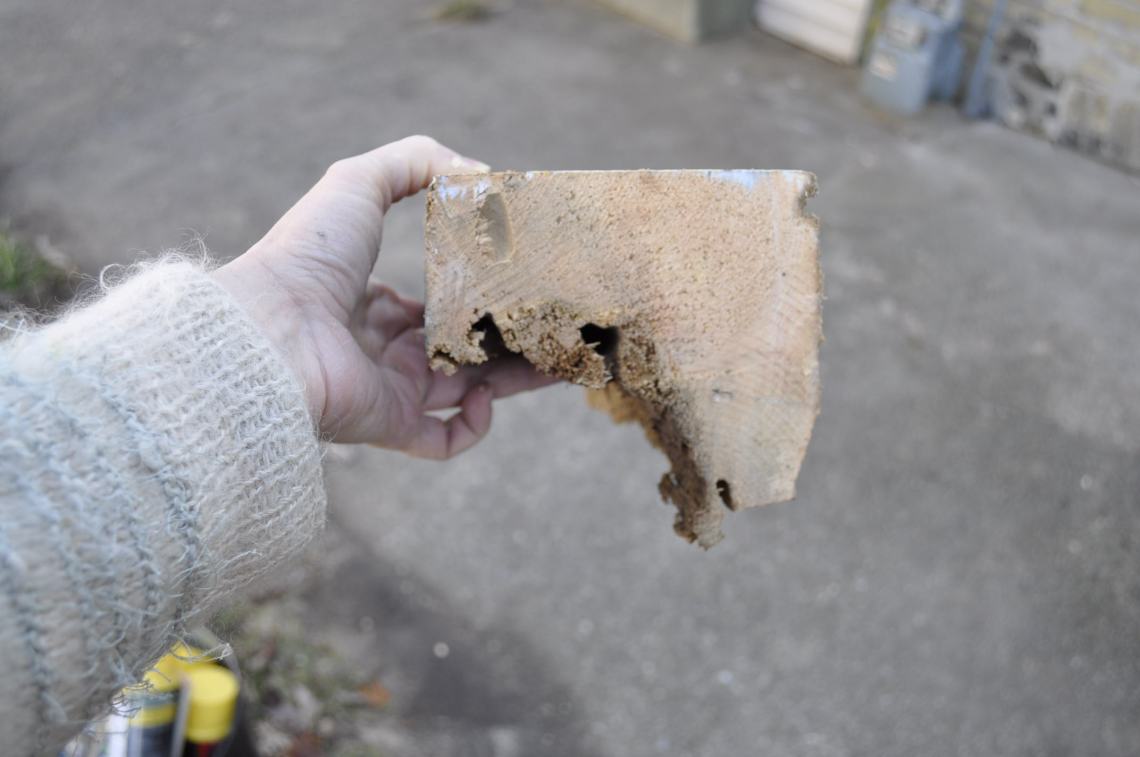
Here’s a nice side view of one of the rotten sills to illustrate how deep the rot was.
I wish I could show the storm window installer this .
More info about how storm windows need room to breathe:
https://inspectapedia.com/exterior/Storm_Window_Weep_Holes.php
